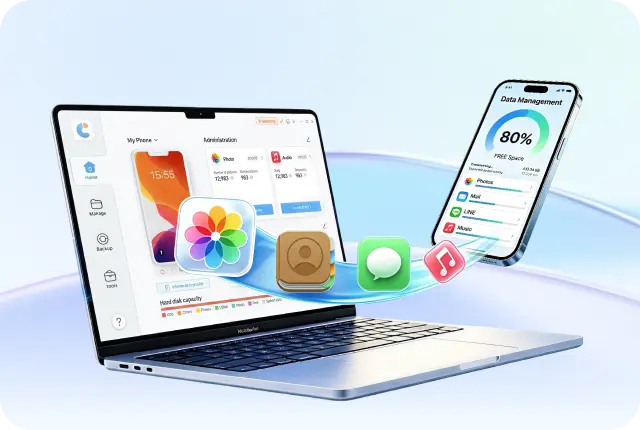

You may have built a music collection on your iPhone, including MP3s, recordings, and downloaded tracks, and now want it on your Mac. But it's not always easy. There's no single method that functions for everything, but there are several dependable options based on your situation. This guide shares how to transfer music from iPhone to Mac in 6 ways, including built-in tools and a third-party option. So, you can pick according to your situation!
Part 1. Can You Transfer Music from iPhone to Mac
Yes. You can transfer music from iPhone to Mac for free. However, how you move your music depends on where it came from. If you use Apple Music, you can sync it with Sync Library. Songs bought from iTunes can also be downloaded again with iTunes. For other files like MP3s or tracks from other apps, you'll need tools like Finder, AirDrop, iCloud Drive, or a third-party app like Tenorshare iCareFone.
Part 2. How We Tested the 6 Ways to Transfer Music from iPhone to Mac
To make this guide more practical, we tested all 6 methods to compare how well they transfer music from iPhone to Mac in real situations.
To identify which methods are actually useful, we tested each one using the same iPhone music library and evaluated how well they preserved songs, metadata, and playlists.
Devices and Test Environment
We used the following devices during testing:
- iPhone 17 running iOS 26
- iPhone 13 running iOS 17
- MacBook Air running macOS Sequoia
- USB cable and wireless transfer where supported
Music Library Used in Testing
To make the results realistic, the test library included:
- 1,240 songs in total
- Purchased songs from Apple Music
- Imported MP3 files from a Windows backup
- Offline downloaded tracks
- Custom playlists
- Album artwork and song metadata
The total library size was approximately 9.6 GB.
What We Checked During Testing
Each transfer method was tested using the same music collection.
For every method, we checked:
- Whether all songs were transferred successfully
- Whether playlists remained available
- Whether album artwork was preserved
- Whether song metadata stayed intact
- How long the transfer took
- Whether the method worked for non purchased music files
For subscription based methods, we also checked whether songs could be accessed offline after transfer.
How We Rated Each Method
Transfer Completeness: Whether the method transferred all songs instead of only purchased tracks.
Metadata Preservation: Whether song names, artists, album info, and playlists remained unchanged.
Transfer Speed: The total time required to move the full music library to the Mac.
Ease of Use: How simple the transfer process was for regular users.
Reliability: Whether the transfer completed successfully without sync issues or missing files.
Part 3. 6 Ways to Transfer Music from iPhone to Mac
Here are 6 ways to transfer music from iPhone to Mac Mini/Air/Pro:
1. Transfer Music from iPhone to Mac Without iTunes
If your music didn't come from iTunes or Apple Music, like MP3s, SoundCloud downloads, or app recordings, Apple's built-in tools won't transfer it. That's where you need a third-party transfer tool.
 Secure Download
Secure Download
Secure Download
Tenorshare iCareFone is an AI-powered iOS File Manager that lets you choose specific songs or playlists and quickly move them to your Mac without losing quality. You won't have to use iTunes or sync your whole library. Here's what more iCareFone offers:
- Import/export music, podcasts, ringtones, audiobooks, movies, TV shows, and more.
- Transfer specific songs or playlists easily with no risk of overwriting existing files on your Mac.
- It can help create new playlists and manage app videos.
- Keeps original audio quality, and supports popular formats like MP3, M4A, AAC, WAV, and FLAC.
- Manage contacts, music, videos, and messages, and backup and restore data.
- Download apps not available in your region, and convert HEIC images to JPG in bulk.
- Includes free AI tools like backup, developer mode, device testing, and wallpapers (Mac only).
Follow the steps beneath to transfer music from iPhone to Mac without iTunes with iCareFone:
- Download, install, and execute iCareFone on your Mac. Then, connect your iPhone to the same Mac. Unlock it.
- Tap the "Manage" tab on iCareFone. Next, choose "Music." Your entire iPhone music library will load.
- Pick the music files you wish to transfer. Hit "Export." Choose Mac as the destination.


2. Sync Library (For Apple Music Subscribers)
If you've subscribed to Apple Music, the easiest way to get your songs on a Mac is by using Sync Library. It keeps your music in sync across all your devices, so songs from your iPhone appear in the Music app on your Mac.
However, they're usually streamed unless you download them, and this only works for Apple Music tracks, not MP3s or other files. You also need an active subscription and must turn it on for both devices. Large libraries can take some time to sync. Follow the instructions beneath to sync music from Mac to iPhone wirelessly:
- Open the "Music" app on your Mac. Then, choose "Account." Tap "Sign In." Input the Apple ID you used to purchase the subscription.
- On your iPhone, head to "Settings." Choose "Music." Then, toggle on "Sync Library."
- On your Mac, open the "Music" app. Tap "Settings" on "Preferences." Next, select "General." Check "Sync Library."
- Make certain both devices are signed into the same Apple ID and connected to Wi-Fi. Wait for the sync to complete.
- To save tracks locally on your Mac, right-click any album or playlist and select "Download."


3. Transfer Music from iPhone to Mac via Finder / iTunes
On newer Macs, Finder replaces iTunes for managing iPhone music, but the steps are the same. However, you can't easily select specific songs, syncing may overwrite your existing music, and only purchased tracks can be transferred. Music from other apps isn't supported as well, and you need a USB cable for transfer. Here's how to transfer music from iPhone to Mac via Finder/iTunes:
- Connect your iPhone to your Mac via USB. Then, unlock your iPhone. Tap "Trust This Computer."
- Open "Finder/iTunes" on your Mac. Next, click your iPhone based on whether you're using Finder or iTunes.
- Click the "Music" tab. Check "Sync Music" on iTunes or "Sync Music" on [your iPhone name]" to see your options.
- To retrieve purchases specifically, use "File." Then, choose "Devices." Tap "Transfer Purchases from iPhone" in the "Music" app.


4. Transfer Music from iPhone to Mac with AirDrop
AirDrop lets you send a few songs from your iPhone to your Mac wirelessly without cables. You just share the file, and it appears on your Mac. But it's not good for large music libraries since you can't easily transfer many songs at once.
It also only supports files in the Files app, not protected Apple Music songs. Furthermore, both devices must have Wi-Fi and Bluetooth on, and they need to stay close for it to function properly.
- On your Mac, open "Finder." Then, choose "AirDrop." Set visibility to "Everyone" or "Contacts Only."
- On your iPhone, head to "Settings." Choose "General." Switch on "AirDrop."
- Next, open the "Files" app on your iPhone. Locate the music files (MP3, M4A, etc.) you want to transfer.
- Long-press the file(s). Next, select "Share." Tap "AirDrop." Choose your Mac from the list of nearby devices.
- Accept the incoming file on your Mac. Files land in your "Downloads" folder by default.


5. Transfer Music from iPhone to Mac with iCloud
iCloud Music Library or Sync Library is a cloud-based service that can transfer MP3s and other non-protected music between your iPhone and Mac. When you turn on the "Sync Library" on your iPhone, and in the "Music" app on your Mac, your phone's music will show up on your Mac.
But this method uses your iCloud storage, which is only 5GB for free and can fill up fast. Also, it doesn't support Apple Music or iTunes purchases, relies on internet speed, and doesn't allow you to transfer specific files. Here's how to transfer music from iPhone 16/iPhone 17 to Mac with iCloud:
- On your iPhone, head to "Settings." Choose "Music." Then, toggle on "Sync Library."
- On your Mac, open the "Music" app. Tap "Settings" or "Preferences." Next, select "General." Check "Sync Library."
- Your music library will start syncing. Afterward, you can check the music files in the "Music" app on your Mac.


6. Transfer Music from iPhone to Mac via Transfer Purchases
In case you've bought music from the iTunes Store, you can download it again on your Mac using Transfer Purchases. It's useful for restoring songs you've already paid for, but it supports iTunes purchases, not MP3s or Apple Music.
You also need to use the same Apple ID. Besides, some older songs may not be available, and a USB cable is required. Follow the steps beneath to transfer music from iPhone to Mac without syncing with Transfer Purchases:
- Connect your iPhone to your Mac via USB and unlock it. Trust the computer if prompted.
- Next, open the "Music" app on your Mac (or iTunes on older macOS versions).
- From the sidebar, choose your iPhone. Right-click it. Then, tap "Transfer Purchases."
- Wait for the process to complete. All eligible purchased songs will appear in your Mac's "Music library."

Part 4. FAQs on Transferring Music from iPhone to Mac
Q1. How to fix Apple Music on Mac not syncing with iPhone?
If your Apple Music on Mac is not syncing with your iPhone, sign out of Apple Music on both devices. Then, sign back in with the same Apple ID. Next, turn "Sync Library" off and back on in "Settings" on both your iPhone and Mac. If it still doesn't work, check your Wi-Fi or update your iOS and macOS. You can also turn "iCloud Music Library" off, wait a bit, and turn it back on to refresh the sync.
Q2. What is the easiest way to transfer music from iPhone to Mac?
For most iPhone users, especially with mixed or non-iTunes music, iCareFone is the easiest choice. Just connect your iPhone, pick your songs, and export them to your Mac without worrying about syncing or losing files.
Q3. How long does it take to transfer music from iPhone to Mac?
Transfer speed depends on the method and how many songs you have. Using a USB cable with a tool like Tenorshare iCareFone is the fastest. About 1,000 songs can transfer in under 5 minutes. In comparison, AirDrop is a bit slower, while iCloud Music Library depends on your internet and can take 30 minutes or more. Whereas Apple Music Sync Library is usually the slowest and may take hours for large libraries.
Conclusion
You can learn how to transfer music from iPhone to Mac in several ways. But each has limits, like needing a subscription, slow speed, zero selective transfer, or only supporting certain files. Besides, Apple options don't function well if your music comes from different sources.
But Tenorshare iCareFone is different. It supports all types of music, doesn't need a subscription, and retains the original quality. You can also choose exactly which songs to transfer, giving you full control over your library.



- Free backup everything you need on iPhone/iPad/iPod
- Transfer music, photos, videos, contacts, SMS without limitation
- Selectively restore files without erasing current data
- 1-Click to transfer photos from iPhone to PC/Mac
- Supports the latest iOS 26 and iPhone 17
100% clean & secure
100% clean & secure
Buy safely
Buy safely
 The END
 130
130 17
17 15
15 41
41 21
21 28
28 87
87