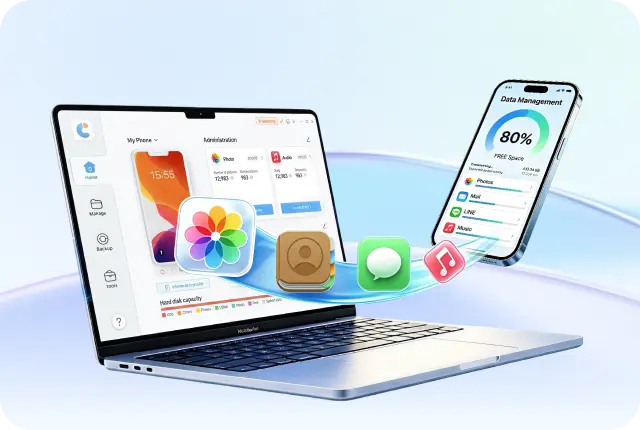

Transferring photos from your iPhone to a PC is something almost every iPhone user needs to do, whether to free up space or keep a backup. But the methods for moving pics from iPhone to Mac might not suit a Windows PC. You also might worry about losing quality during the transfer, especially with Apple's HEIC or ProRAW formats.
However, in this post, we'll share 7 specific Windows-compatible ways to transfer photos from iPhone to PC, each suited for different needs. Every method has its pros and cons, so keep reading to find the one that suits your situation and preferences.
Part 1. Can You Transfer Photos from iPhone to PC without Losing Quality?
Yes, you can transfer photos from an iPhone to a PC without losing quality if you pick the right method. iPhones use HEIC and ProRAW formats, which can be compressed or converted during transfer. To keep full quality, use a direct cable, or iCloud set to "original" quality.
HEIC is Apple's default, smaller than JPG but not always supported on PCs, while ProRAW contains full sensor data and requires manual conversion. If your photos end with .HEIC, they're in the HEIF format used by iPhones. Windows can't open these directly, so you need to set your iPhone to automatically convert them to JPEG when transferring to your PC. To do so:
- Head to "iOS Settings" on your iPhone. Then, choose "Photos." Tap "Transfer to Mac or PC." Next, select "Automatic."Afterward, you can check the next sections to pick a method to move pics from an iPhone to a PC, according to your situation or preferences.

Part 2. How I Tested the 7 Ways to Transfer Photos from iPhone to PC
Many guides claim that photo transfer is simple, but in actual use, some methods compress images, convert formats, or fail when transferring large libraries. In some cases, Live Photos and metadata such as date or location can also be lost.
To see which methods work best in real situations, I tested each one using the same photo library and compared the results based on image quality, speed, ease of use, and transfer stability.
Test Devices and Computer Setup
I used the following devices during testing:
- iPhone 17 running iOS 26
- iPhone 13 running iOS 17
- Windows 11 PC
- USB C cable and WiFi transfer where required
Photo Library Used for Testing
To make the comparison realistic, I transferred a mixed photo library containing:
- 3,860 standard photos
- 412 Live Photos
- 178 4K videos
- 97 screenshots
- 56 portrait photos
- HEIC and JPG formats
The total library size was approximately 46 GB.
What I Checked During Testing
Every method was tested using the same photo library.
For each one, I compared:
- Whether original resolution was preserved
- Whether HEIC files stayed in original format
- Whether Live Photos remained intact
- Whether photo metadata was kept
- Transfer speed for large libraries
- Whether the transfer failed or disconnected
How I Rated Each Method
Image Quality: Whether the transferred photos kept their original resolution without any compression.
Format Preservation: Whether original file formats such as HEIC remained unchanged after transfer.
Transfer Speed: The total time required to transfer the full photo library to the PC.
Ease of Use: How simple the transfer process was for regular users without technical steps.
Reliability: Whether the transfer completed successfully without missing files, connection errors, or interruptions.
Part 3. Transfer Photos Using Windows File Explorer
The easiest way to transfer photos from iPhone to PC is with a USB cable. Windows sees the iPhone like a removable drive, so you can drag and drop photos directly. It's fast, free, and keeps the original quality if your iPhone is set to "Keep Originals."
You don't need extra software, and it functions on any Windows version. However, you can only access the camera roll (DCIM), need a cable, and may need a codec to view HEIC files on your PC. Follow the steps beneath to move photos from your iPhone to PC with File Explorer:
- Attach your iPhone to your PC using a USB cable. Then, unlock the phone. Tap "Trust" when asked.
- Execute File Explorer on your PC (Win + E). Locate your iPhone beneath "This PC" or "Devices and Drives."
- Move to "Internal Storage." Check folders by date. Select your photos from your desired folder and drag them to a folder on your PC.
- Safely eject the iPhone when done transferring pics.


Part 4. Transfer Photos from iPhone to PC via iCareFone
A third-party transfer tool like iCareFone offers a one-click transfer of pics from your iPhone to your PC without losing quality, iTunes, or iCloud. It lets you access all albums, including live and burst photos, offers a clean interface for selecting images, and can convert HEIC files to JPG. With AI photo recognition, it can also help automatically identify and group similar photos for easier selection before transfer. The tool also allows selective and bulk import of pics, and batch deletion of similar photos. Here's more about iCareFone to check out:
 Secure Download
Secure Download
Secure Download
- 1-Click Photo Transfer: Quickly move photos from iPhone to PC/Mac while keeping original quality.
- Contact & File Management: Export/import contacts, organize bookmarks and videos, and manage iPhone files using a secure virtual USB space.
- Music Management: Transfer music between iPhone and computer without iTunes, organize playlists, play tracks on PC, and set ringtones easily.
- App Download & Management: Install apps not available in your country, update or uninstall apps from your computer, and detect hidden apps on your iPhone.
- Backup & Restore: Preview, export, or restore backups to any device without overwriting existing data. Supports 20+ data types, including WhatsApp chats.
- Free Features: iPhone backup, developer mode, iPhone test, AI wallpapers (Mac only).
Here's how to move photos from your iPhone to PC with iCareFone:
- Download, install, and execute iCareFone on your PC. Then, attach your iPhone to the same PC.
- Unlock your iPhone. Then, click "Trust This Computer" if asked. Open the app. Next, select "Export Photos" for a one-click transfer.
- Photos are successfully moved from your iPhone to your computer.


Part 5. Transfer Photos Using Windows Photos App
Windows 11's built-in Photos app lets you import photos and videos easily, automatically sorting them by date. It's simple and beginner-friendly, with no extra software needed. However, it's slower than using File Explorer for large batches, has limited filtering options, and may not recognize all albums or file types. Follow the instructions beneath to transfer photos from iPhone to PC using the Windows Photos app:
- Connect your iPhone to your PC with a USB cable and unlock it. Click "Trust" on your iPhone when the prompt appears.
- Open the Photos app from the Start menu. Next, tap the "Import" button (top right).
- Windows will scan your iPhone and display all importable photos. Choose to import all or select specific items.
- Hit "Continue." Then, tap "Import." If there's no "Continue" button then, click "Import."


Part 6. Transfer Photos Using Apple Devices App
Apple's official Windows app, Apple Devices, lets you manage your iPhone on a PC and manages HEIC photos well. It keeps your album structure and is free, dependable, and regularly updated. It's also a good alternative to iTunes for Windows 11 users.
But you must have the latest version of iTunes installed on your computer for this method to function. Moreover, this app uses syncing, which can overwrite photos if set up incorrectly, is slower than direct copying, and requires signing in with your Apple ID. Here's how to transfer photos from iPhone to PC without iTunes with the Apple Devices app:
- Download the "Apple Devices" app from the Microsoft Store and install it. Then, execute the app and connect your iPhone via USB.
- Unlock the iPhone. Hit "Trust" on the prompt. Then, click your device name in the "Apple Devices" sidebar.
- Move to the "Photos" tab in the left panel. Enable photo syncing and select the albums or folders to sync.
- Hit "Apply." The photos will transfer to your chosen PC folder.


Part 7. Transfer Photos from iPhone to PC with iTunes
iTunes is the traditional way to transfer photos from iPhone to PC quickly to older Windows versions. It's familiar to long-time Apple users and also manages music, apps, and backups. However, it only syncs in one direction, is bulky with many unused features, and is no longer recommended on Windows 11. Here's how to transfer photos from iPhone to PC on Windows 10:
- Download and install the latest iTunes from Apple's website or the Microsoft Store. Then, execute iTunes.
- Connect your iPhone via USB cable. Trust the connection on your iPhone and enter your passcode if prompted.
- Tap the device icon near the top left in iTunes. Select "Photos" from the left sidebar.
- Check "Sync Photos." iTunes shows the folder it copies photos from. If your photos are elsewhere, click the folder name. Then, tap "Choose folder."
- In "Windows Explorer," pick the folder with your photos. Tap "Select Folder."
- iTunes will start syncing and backing up your iPhone. The process takes a few minutes, depending on the number of photos and storage.


Hit "Apply" in iTunes.


Part 8. Transfer Photos via iCloud
If you want to transfer photos from iPhone to PC without cable, iCloud Photos can sync your phone photos to your PC via Wi-Fi. New photos upload automatically, and you can access them from any device while keeping original quality. However, iCloud has limited free storage (5 GB), long initial sync times for large libraries, and the need for a steady internet connection. Here's how to transfer photos from iPhone to PC wirelessly with iCloud:
- On your iPhone, head to "Settings." Then, choose "[Your Name]." Tap "iCloud." Then, click "Photos." Enable "iCloud Photos."
- Download "iCloud for Windows" from the Microsoft Store and sign in with your Apple ID.
- Open "iCloud for Windows." Next, check the "Photos" option."
- Check the "iCloud Photo Library," and "Download new photos and videos to my PC" options. Hit "Apply." Wait for photos to sync. This may take time, depending on library size.
- Execute "File Explorer." Move to "iCloud Photos" beneath "Favorites" or "This PC." Photos are now available in your PC's file system. Copy them as needed.


Part 9. Transfer Photos via Snapdrop
Snapdrop is a free, browser-based tool to transfer photos from iPhone to PC online. No app, account, or cables are needed, and it operates on any device. It's great for a few photos, but both your iPhone and PC must be on the same network. Also, it's not ideal for large libraries, and files go straight to Downloads, and sensitive content should be avoided. Follow the instructions beneath to move photos from your iPhone to a Windows PC with Snapdrop:
- Connect both your iPhone and PC to the same Wi-Fi network. On your iPhone, open a browser and visit snapdrop.net.
- On your PC, open any browser and head to snapdrop.net. Both devices should appear as named icons on each other's screens.
- On your iPhone, click your PC's icon and select the photos you want to send. Hit "Open."
- Accept the incoming files on your PC. Tap "Save" for each file. They download to your default "Downloads" folder.


Conclusion
There are several ways to transfer photos from iPhone to PC in 2026, from simple USB transfers and Windows apps to iCloud, Snapdrop, and Apple's tools. Each method has its pros and cons. But for an easier, faster, and more flexible experience, especially if you want to keep original quality, manage albums, or convert HEIC files, iCareFone is recommended. It simplifies the process with one-click transfers, selective management, and full support for photos, videos, music, and more.



- Free backup everything you need on iPhone/iPad/iPod
- Transfer music, photos, videos, contacts, SMS without limitation
- Selectively restore files without erasing current data
- 1-Click to transfer photos from iPhone to PC/Mac
- Supports the latest iOS 26 and iPhone 17
100% clean & secure
100% clean & secure
Buy safely
Buy safely
 The END
 130
130 17
17 15
15 41
41 21
21 28
28 87
87